T-N.T. ARES Kar98k Kit Guide|Adjustment & Notes
How to Improve Feeding Smoothness on the ARES Kar98k?
【ARES Kar98k Installation Tips|Feeding Smoothness Optimization Guide】
If you are installing the T-N.T. Upgrade Kit yourself, we recommend performing the following simple optimizations during assembly to improve feeding smoothness and overall operational stability.
Under the original factory design, the front edge of the cylinder head and the BB feeding contact area may contain sharp edges or rough surface finishing. During repeated use, these small details can increase feeding resistance, potentially causing feeding jams, double feeding, or bucking wear.
Proper pre-processing can significantly improve these issues:
Remove the cylinder head
Slightly chamfer the BB feeding contact area
Carefully polish the modified surface
Reassemble after completion
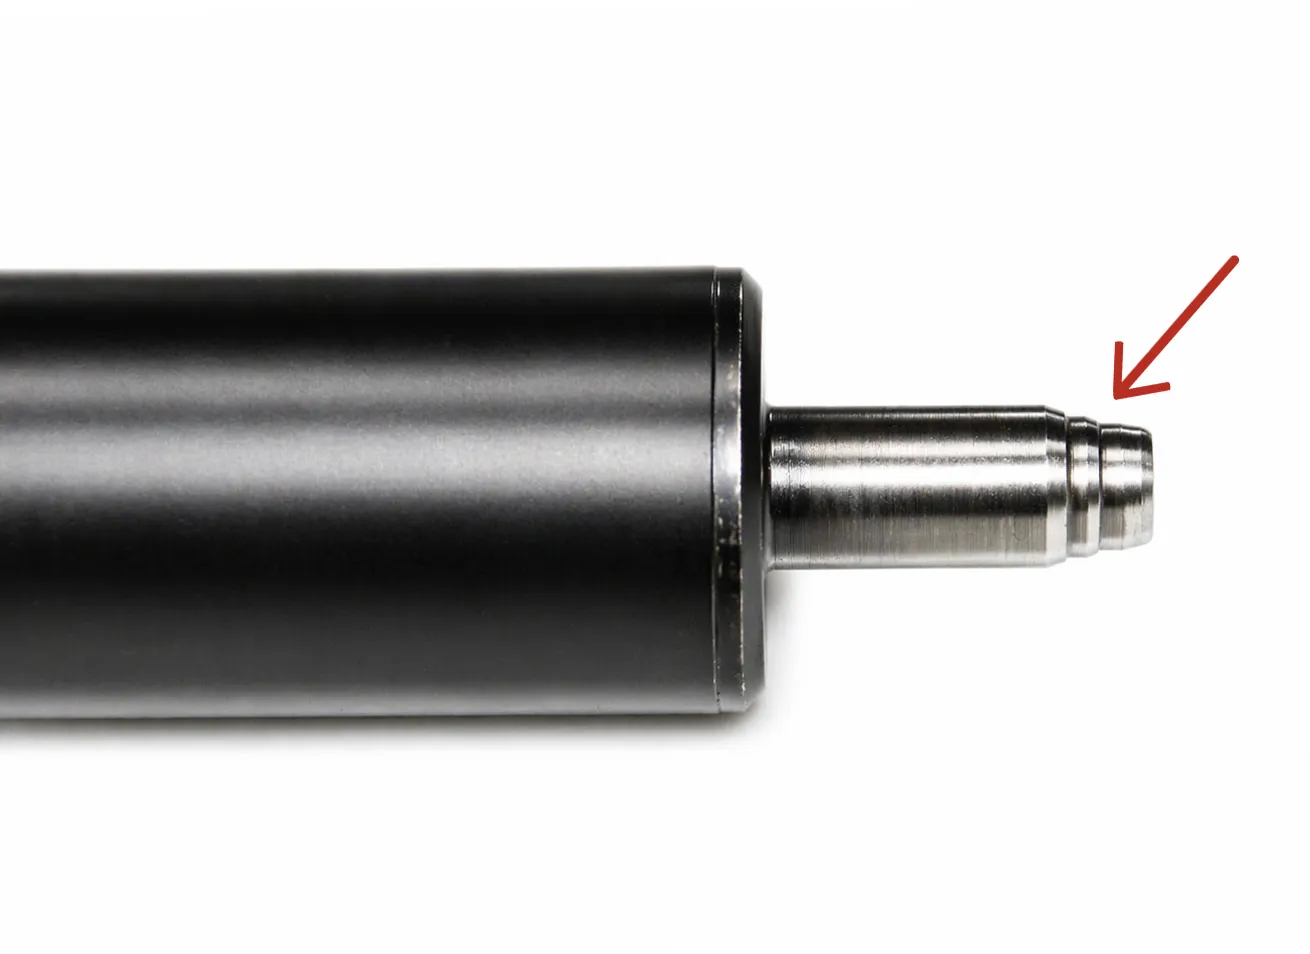
Chamfering and polishing help reduce contact resistance during BB feeding, allowing smoother operation while minimizing the risk of bucking damage or edge wear.
Although this optimization is relatively simple, the improvement is highly noticeable, especially for players performing self-installation or advanced tuning. When properly executed, it can further improve the overall stability and user experience of the ARES Kar98k system.
【T-N.T. Quick Spring Replacement Guide】
T-N.T. provides a simple step-by-step guide to help players quickly replace the spring. Please refer to the video during installation.
Use a flat-head screwdriver to remove the sear retaining screw
Remove the sear
Pull out the bolt assembly (cylinder)
Use needle-nose pliers to unscrew and remove the cylinder head
Remove the piston, spring, and steel spring guide
※ The original factory spring guide uses a tapered design and is not compatible with standard springs. The spring guide shown in the image has already been modified to support common 9 mm aftermarket springs.
Apply a small amount of lubricant before installing the new spring, then reassemble following the original procedure
Reinstall the cylinder head
When reinstalling the bolt assembly, hold the trigger first before pushing the bolt back into place to ensure smoother installation
Reinstall the sear retaining screw
After reassembly, the system is ready for normal operation, and the overall replacement process is quick and straightforward.
After installing an M150 spring, we recommend testing muzzle velocity using 0.2 g BBs to confirm proper operation and performance consistency.